How to enlarge any part of a photo in iPhone and iPad? Sometimes it happens that it is necessary to select a part of a photo or enlarge its fragment in order to consider finer details. Luckily, the iPhone and iPad have a built-in tool to accomplish this.
How to clear the cache in Viber on iPhone, iPad, Android, Windows or Mac computer?
Apple has integrated a magnifying glass feature into the Markup tool. It can be found and useful in various places in iOS and iPadOS. For example, you can access it when you edit an image or PDF in the Files app, or when you open an attachment in the Mail app.
- How to enlarge any part of a photo in iPhone and iPad?
- In the Photos app, open the image where you want to enlarge some detail, and then click the Edit button in the upper right corner.
- Click the Markup button.
- Press the “+” button and select the “Magnifier” option.
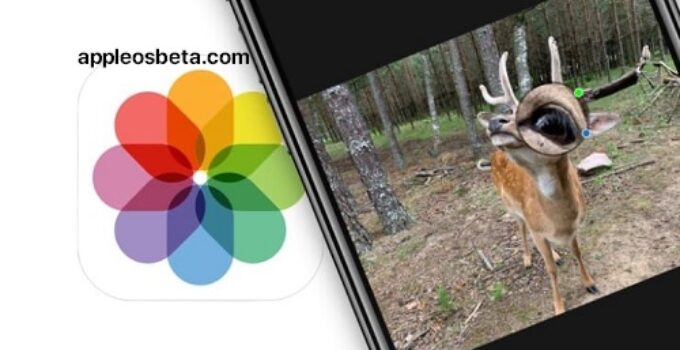
You will see a “magnifying glass” in the center of the image. You can drag it to any part of the photo you want to enlarge.
The blue dot will help you zoom in and out of the magnifier. Touch it and swipe in or out to change the size.
You can use the green dot to change the zoom level. Swipe right on a dot to zoom in, or swipe left to zoom out.
When you click on the circle, you’ll get the classic cut, copy, delete, and duplicate loupe options.
- When you’re done editing, click the Done button at the top of the screen. Then, on the image editing screen, click the Done button at the bottom of the screen.
The edited photo will appear in the gallery. You can share the image via email or messaging app.


