
How to password protect files and folders on Mac? Security, confidentiality, preventing accidental data modification: there are many reasons why it can be useful to password protect a file or folder on the Mac. This feature is useful for not allowing third parties access to our files, when the Mac is used for example with a single account by multiple users or when we want a minimum of protection for files that we copy on external media that could end up to unknown.
How to Scan Text in Notes on iPhone?
If the problem is who accesses the Mac, set a password at login
If our purpose is simply to prevent others from accessing our files, it is possible to protect the entire computer by activating the password request when the computer starts.
In the most recent versions of macOS just go to System Preferences, select “Users and groups”, click on “Login options”, unlock the padlock at the bottom left indicating the name and password of the administrator user (to enable the changes) and set the option “automatic login” to “inactive”.
By setting automatic login to “Inactive”, users are prompted to log in each time the Mac is restarted. This option is useful if your Mac has only one user and is always in a safe place. If security is of concern, automatic login should be disabled.
If the Mac is used by several people, it is good to create several users: each of these will have a reserved access to the system, with its own desk, its own document folder, etc.
How to password protect individual files
If the Mac account is used by several people, you can protect some files or folders with a password. There is no unique mechanism to password protect a single file, but many applications allow you to save documents by setting an open password. The latter will be requested when someone tries to open the document. Let’s see below how to activate password saving with various applications.
Password protect a Word 2011 file
Microsoft’s word processing application allows you to save a document by setting a password for reading or editing in the file in question. When saving the document, simply click on the “Options” button, from here choose “Show all”, click on “Security” and indicate any password for opening and editing (it can also be two passwords different).
If you enter the correct password, the document will be opened as read-only, but it will not be opened without a password. If the password is lost, the document can no longer be opened. The system is case sensitive and the maximum length of passwords can be 15 characters. The password will also be requested if the document will be opened with a program other than Word (eg Preview).
The “Recommended read-only” option displays a message inviting other users to open the document as read-only: if a document is opened and edited, it will need to be saved with a different name. You can set this check box without setting any passwords.
Word for Mac also allows you to enable or disable protections for revisions, comments, or forms in your document.
Password protect an Excel 2011 file
Excel also allows you to save a document by setting a password. To do this, simply choose “Save” or “Save as” and click on the “Options” button indicating the opening password, modification password (to allow only authorized users to make changes to a workbook) and cross the box if necessary “Read only recommended”.
You can prevent unauthorized users from opening or modifying a workbook, even if they would actually have permission to open the file. When you create a password for a workbook, it is important to remember or make a note of the password you typed and keep it in a safe place. If you lose the password set to protect a workbook, you will no longer be able to access that folder.
How to password protect a document using Word for Mac 2016
Even with office 2016 you can prevent unauthorized users from opening a document or editing a document. You can also protect your document by specifying how and if other users can post feedback. The procedure differs from previous versions of Word. To prevent the document from being opened or modified, click on “Review” and click on the “Protect document” icon.
In Security you can specify whether a password must be entered to open the document and / or modify it. Repeat each password to confirm it and press OK.
The same applies to previous versions of Office: passwords are case-sensitive and a maximum of 15 characters can be used. If you lose or forget your password, Word cannot recover it. Keep a copy of the password in a safe place or create a strong password that is easy to remember.
Require a password to open or edit Excel 2016 files
Even with Office 365 for Mac or Excel 2016 for Mac, you can require a password to open or edit a workbook. Here’s how to proceed:
- Open the sheet or workbook you want to protect
- In the “Review” tab click on “Protect Sheet” or “Protect Workbook”.
- In the Password box, type a password and in the verify box, type the password again.
- Choose any other desired security options and click OK.
Password-protect a Pages, Keynote, or Numbers file
Apple’s iWork applications (Pages, Keynote and Numbers) for Mac allow you to password protect documents. Just select “Set password” from the “File” menu. Passwords can consist of virtually any combination of numbers, uppercase or lowercase letters, and special keyboard characters. A document can only have one password. If we change the existing password when sharing a document with others, the new password replaces the original. It is important to remember that there is no way to recover the password if the user forgets it. So make sure you choose a password you won’t forget or write it down in a safe place.
Protect iWork documents with Touch ID

If your computer has Touch ID, which allows you to take advantage of fingerprint recognition, you can use it to open password-protected documents using only your fingerprint. The first time the Touch ID must obviously be configured (just go to System Preferences, select Touch ID, click on “Add a fingerprint” and follow the instructions on the screen) and Pages set to use this function (from the “Pages “Choose Preferences and the option” Use Touch ID. “)
Protect Notes on Mac
The Notes application on the Mac is great for capturing a quick thought or saving something important or interesting to use later. It’s simple, fast, and syncs with iCloud. You can protect individual notes by selecting them and choosing the “Protect this note” option from the File menu.
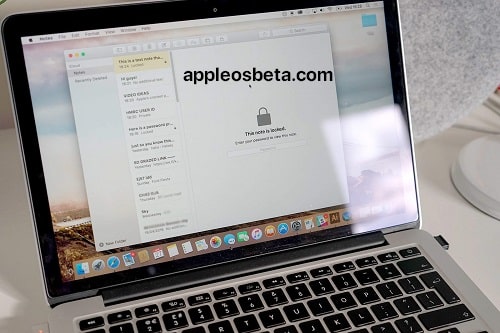
Notes protection allows you to keep them private from others who may use your iOS device or our Mac. Notes uses a single password to lock all notes (notes in the iCloud account and notes stored on the device). If you can access the notes from a device that supports Touch ID, you can take advantage of using the fingerprint instead of the password for most of the actions. Notes with viceo, audio, PDF or attachments cannot be protected.
What if I forget the Notes password?
If you forget your password, the only way to view a locked note is to use Touch ID (if you have a device that supports Touch ID activated before forgetting the password). For this reason, it is recommended that you add a hint when creating your password. Notes shows the hint after three unsuccessful attempts.
Passwords for notes on other devices
When you create a Notes password on one device, all other devices using the same iCloud account use that password. Please note that protected notes are only visible on devices with iOS 9.3 or later or OS X 10.11.4 or later; on devices with an older operating system, notes cannot be viewed.
Password protect PDF files
A little-known feature of Preview (the standard application with the Mac that allows you to view various types of files) is the ability to set passwords for PDF files. Open the PDF file to be protected with Preview, hold down the Alt key while clicking on the File menu and choose “Save As”.
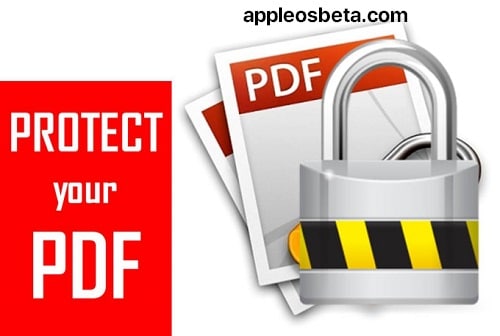
The dialog box that appears allows you to save a copy of the file; indicate the name of the protected file, select the “Encryption” box, indicate and confirm the password to be used. From now on, when we want to open the new saved PDF document, it will be necessary to indicate a password. The Mac indicates files protected in this way with a padlock icon.
What if I want to delete the password of the PDF file?
You can delete the password of the PDF created in the previous step by simply creating a new PDF. Open the protected PDF with Preview indicating the password, select “print” from the File menu, click on PDF at the bottom left, choose “Save as PDF” and save without indicating any security option.
Password-protect a folder on your Mac
macOS does not come standard with utilities to protect folders. There are ad hoc utilities but there is an easy way to activate protected folders without resorting to third party utilities. Here’s how to proceed:
- Open the Disk Utility application
- Select New Image> Image from Folder from the “File” menu
- Indicate the folder to read
- Indicate the location on which to save the disk image, taking care to select the “128-bit encoding” or “256-bit encoding” option; as option “Image format” choose “read / write” and click on “Save”.
- A disk image will be created in the location indicated by the user, in other words a “photograph” of the exact contents of the folder selected in step 3.
- Before you can open and access this disk image, you will need to enter the password indicated above.
- When you open the image file with a double click, obviously you will not have to select the “Store password in the keychain” option, otherwise the system will store the password and this user will no longer be prompted to enter.
Protections yes but not too much
Keep in mind that the protections applicable from within applications (Word, Pages, etc.) are very weak and there are tools that allow you to unlock protected documents and PDFs, without knowing the original password (in the case of Word documents, much depends on the length of the password used: the longer it is, the more difficult it will be to identify it).
 Mode?")

